Wireless Security Door Phone Intercom

posted May 25, 2010 11:48 AM by Alan Mackenzie   [

updated May 25, 2010 2:21 PM ]


Features:

· Outdoor unit runs on 4 x AA batteries (energy saving circuit, lasts up to 1 year)
· 240v power adaptor included for indoor unit
· 1.8Ghz digital interference free wireless operation
· Adjustable volume
· Up to 150m working distance
· Suit a variety of applications
· Outdoor unit suit wall mount or flush mount

Measurement:
Outdoor unit: 11cm (W) x 16cm (H) x 5cm (D) approx
Indoor unit: 10cm (W) x 22cm (H) approx

Got my older kid to purchase this off Ebay for me, $89.99 + $11.90 postage
(I don’t have a credit/debit card…never used a ATM thingo)

We have a high front fence with gates and the top pad bolt is always closed so people have trouble just getting to our front door to ring the doorbell. It’s quite a journey (from upstairs) to go down the stairs, out the front door and up the driveway to open the gate only to discover it’s someone who wants to swap your power, gas, phone or internet.
Now all we have to do is look out the balcony window and talk to them over the intercom – no thanks.

Previous to this I tried out the ALDI wireless doorbell.

ALDI Wireless Doorbell $12.99


  • Adjustable to three operation modes
  • 100m range for transmission
  • Includes table stand and wall bracket and wall mount
  •  
    Purchased this on Friday night, unpacked, installed batteries and had a play with it, not bad so put aside on the counter with a view to install next to front gates over the weekend. Some time during the early hours of the morning the thing went beserk making all sorts of noises that did not even remotely resemble any of the 16 melodies – OMG. Repack this "product of the week" back into the box and tape docket to the side for return and refund.
     
    Checkout my final soultion for the front gates.

    GMC 24V 2 Speed Cordless Hammer

    GTX1850K / GTX2450K
    • 2-Speed Gearbox
    • Hammer Action
    • 13mm Single Sleeve Chuck
    • Adjustable Side Handle with Rubber Grip
    • 20-Stage Clutch
    • Variable Speed and Reverse
    • 2 Battery Packs
    • Battery Indicator Displays 5 Levels of Charge
    • Extensive Rubber Over-moulding
    • 50 Piece Accessory Kit
    • Includes Kitbox

    Specifications:

    • Voltage: 18 V/ 24 V
    • No Load Speed: 1250 RPM
    • Chuck Capacity: 13 mm
    • Chuck Type: Keyless
    • Torque Settings: 20
    • Batteries: 2
    • Charge Time: 3-5 Hours
    • Tool Weight: 2.1/ 2.4 kg
    Purchased from Bunnings a couple of years ago for (I think) $139.00.
    Great buy, heaps of grunt, hammer drill’s into brickwork easily.
    With two 24V batteries you are set to go for the day.
    Global Machinery Co went into receivershipin in 2008 – pity

    Ozito 14.4V Cordless Drill Kit 2 Batteries

    posted May 25, 2010 3:41 PM by Alan Mackenzie


    OZCD144V1BK
     
    FEATURES
    14.4V
    Allows cordless convenience
    Variable speed reversing
    Allows user to control the speed of the drill as well as reverse the direction of rotation
    Soft grip handle
    Ergonomic and less fatigue for the user
    Torque control
    Controls the amount of power being distributed from the drill
    State of charge indicator
    You can establish current battery charge
    Built In LED light
    Allows to use in corners or not well lit up areas


    Purchased this from Bunnings about 12 months ago, the batteries are starting to show signs of not holding a charge.

    ALDI Toaster with Browning Gauge $19.99

    • Wide slots
    • High lift function
    • Frozen, reheat and cancel functions
    • Browning gauge display (light to dark)
    • Slide out crumb tray
    This would have to be the worst toaster ever made! This "toaster" was designed to do one half of the bread. OK…so you turn it over to do the rest only to find that the bit that got done the first time gets zapped again! how can that be??? The final result is one half lightly toasted and the other burnt.
    It went back the next day. No problem, we have a house full of ALDI stuff and only returned a few items.
     

    Rainwater tank

    In January 2008 over the holiday period I installed a rainwater tank. The total cost was about $2000 and we sourced all the bits and pieces from two suppliers, One Stop Sprinklers and Bunnings; both in Notting Hill. This is not just about having water for the garden, I actually get back some of my normal life that was taken away by local, state and federal authorities. now I can water the garden, wash the cars and clean the concrete and windows whenever I feel like it and at a time that suits me – not them.


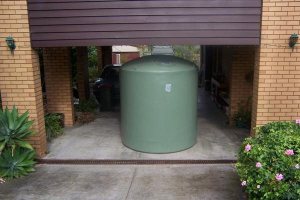
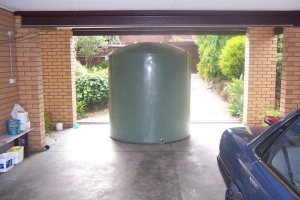
    Above: Just finished helping the delivery guy get the tank off the truck and down the driveway to the front of the carport.
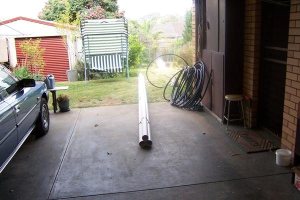
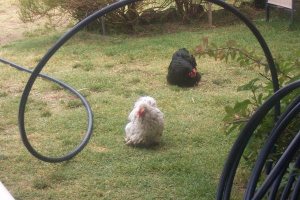
     

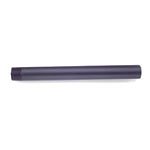
    The Nylex 4500L tank ($1150), 90mm PVC and 50mt of 25mm Blueline poly pipe was purchased at Bunnings. The chooks are already attracted by the activity.
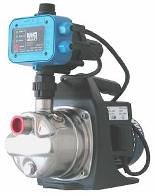
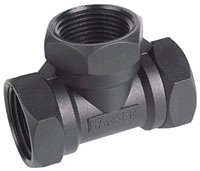
     

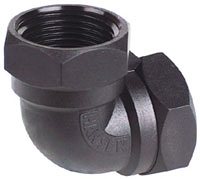
    I purchased the BIANCO INOX 80PC 800W pump from One Stop Sprinklers along with a bag full of fittings including two bib taps.

    I spent some time wandering around the house thinking about where to locate the tank? Normally you locate it close to the house to hook directly into the downpipe(s); but I don’t want the thing too close to the house and to move further away requires a wet system, again not what I want because this type of system tends to build up too much back pressure in heavier downpours and the gutters end up overflowing etc. What about collecting water off the 3.5m x 7m garage (workshop) roof?…a  nice clean Colourbond roof! I worked out from rainfall charts that the amount water collected from the garage roof should be adequate to fill the tank – which would be hidden behind the garage!
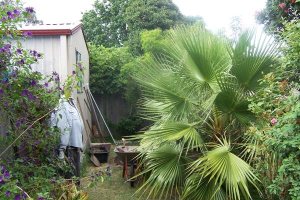
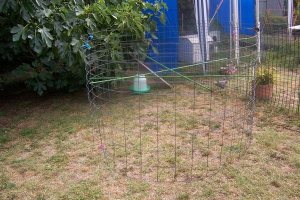
     

    Above shows the location and right is a picture of the animal fencing I used to make up a "template" for marking out the area to be levelled.
    Plastic garden stakes and cable ties held the wire in a resonably round shape so it could be moved around without collapsing.
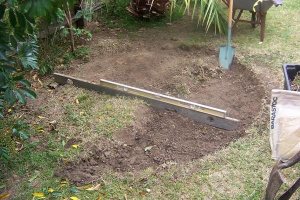
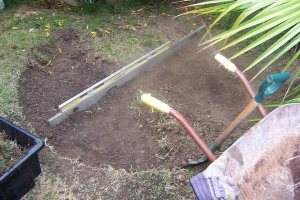
     

    Here we are levelling the sloping site, I used packing sand for the base. Concrete is a overkill.
    Next job is to get the tank in place without disturbing the sand base too much, the thing is quiet heavy so I put down on the sand some chipboard shelving and pushed, shoved, dragged until the tank was in place. Then I went around and pushing with my shoulder pulled out the boards, then around again rocking the tank to bed it into the sand – checking with spirit level. After this rest for a while.
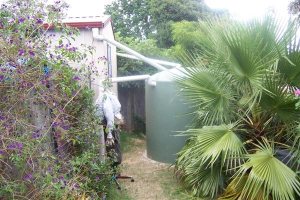
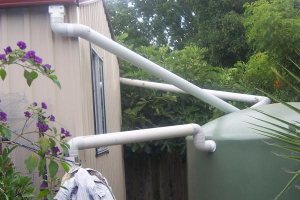
      

    Above shows the tank with it’s PVC connections to the gutters. Turning the overflow up gained hundreds of litres of extra water.
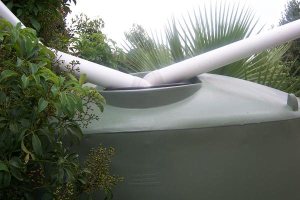
    Tighter shot from the other side showing tank inlet with pipes coming in with 45’s on each end. I came back later and screwed two downpipe brackets onto the edge of the inlet to secure the pipes.

    We are only halfway there, still have to connect the pump and run the poly along the back fence and up the side to the front yard with a couple of taps.
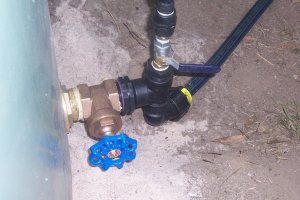
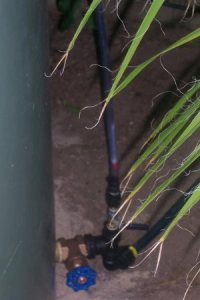
     

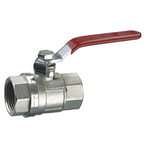
    The tank comes fitted with a BSP outlet and gate valve supplied in a plastic bag. I wanted to have some sort of simple water level gauge so we have a T piece, the bottom connects to the pump and the top has a ball valve with adaptor connecting to a length of plastic tubing (water level gauge) that runs up the side of the tank and just onto the top of the tank where it it held with a stainless steel self tapper. I use a cloths peg (yellow one) to mark the level.
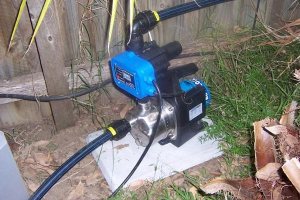
    You are supposed to use a flexible hose fitting between the tank and the pump to soak up virbation and movement but I did’t bother, just use a short lenght of Blueline. Later I bolted the pump to the concrete slab.
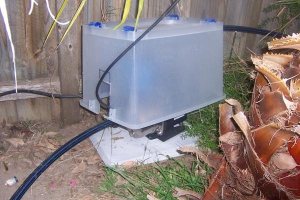
    I did not want to pat $150 bucks for a pump cover so I use a 50lt plastic storage container, and like the pump came back later with pump cover version 2.0 with neater cut outs including one at the top for the pump output. The whole thing sits down lower and looks much neater – must take a another photo.
    I also covered the whole lot with a board angled down from the fence to the palm tree. I am very happy with the pump, it is very quiet and preforms well.
     
     
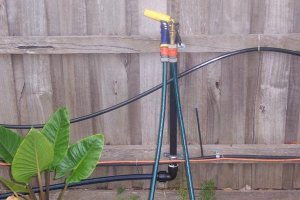
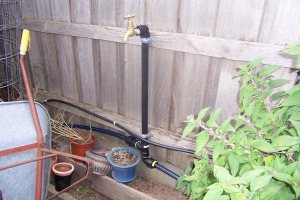
    This is the backyard tap located conviently next to the garden shed and inline with the back of the house so its easy to move the garden hose between this and the main tap.
     
     
    End of the line, this is the front garden tap and the 50mtrs of polypipe worked out well with about 3mtrs left over.
    The other pipe snaking through is a drip system and the smaller one clipped to the fence timber(with a riser) is the sprinkler system.
    The orange cable feeds the 12V garden lights on this side of the front garden.
     

    Chook run renovation

    The old chook run
    Actually this was more like a rebuild. We keep a few Bantams in the backyard and here is how the run looked in November 2006. It was simply star pickets with wire framing to support the chicken wire. I later realized the 25M roll I bought was actually bird wire which is a lighter gauge so it deteriorates more rapidly than chicken wire.
     
    AGF00003  AGF00013
     
    The above photos are taken from the kitchen meals area window (two story house).
    Cara doing what Maremmas do and guarding her livestock, in this case three little Silkie bantams. RIP to all of them.
     
    Image23
     
    Later on I added a tarp for some cover. They don’t last long in the weather.
     
    The new chook run


    I screwed pine poles to the existing pickets and added a some additional poles. The centre half round poles support the ridge board (eave board from demolished house) and secured with brackets/screws. Roof framing is 100×75 pine and everything was cut with a mitre saw sitting on a BBQ bench seat – LOL. Wire is expensive! a 25M roll of this stuff costs around $225 bucks – ouch. The picture on the right shows some PVC pipe that is the overflow from the rainwater tank.


    Need to paint everything before any thoughts of roofing…buy can of mission brown for about $60 and apply with Taurus paint compressor gun. Did I say wire is expensive…so is laserlite roofing, bought 10 sheets for about $220. Box of 250 self-drilling roofing screws for $12 and don’t forget the noise stop adhesive tape AKA purlin tape, they come in 24M rolls and I need three rolls – this is crazy. I made do with two rolls, in the pictures you can see where I have cut the tape in half and applied to some battens and rafters.


    Finally we can do some roofing! I bought 10 sheets and two of them are clear and to go at the front of the shed to provide some extra light.
     
     
    This picture shows where I have stopped near the gate, the next two will be the clear sheets and then back to the green to finish off.
     
     
    All done…hope the girls like the renovations!