We are upgrading ET’s 1997 Lancer GLXi to a 2006 model.
MY06 Lancer ES with the 2.4lt MIVEC engine.

 |
We should be getting the car tonight or over the weekend…more to come. |
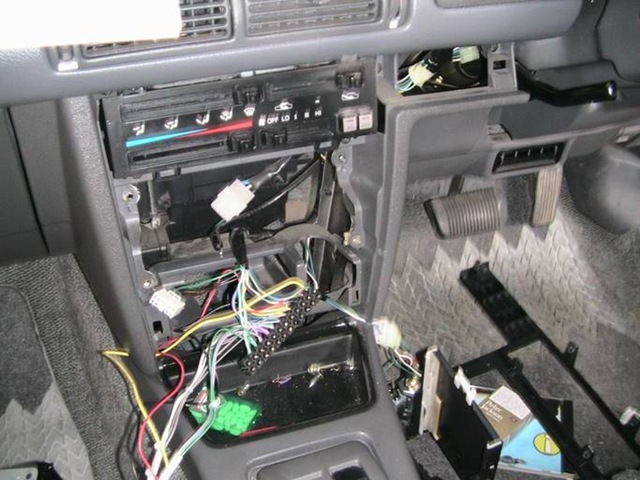
Purchased this from Autobarn for ET’s Lancer CE so she could play her CD’s.
Don’t have any pictures of this install but they are all much the same – see my Camry SV21 audio upgrade.
Pioneer DEH-3250UB Car CD MP3 USB Tuner


Main Features:
LCD Display (10-Character)
USB Direct Control for iPod/iPhone and USB Devices (CD-IU50 Required for iPod/iPhone)
AUX Input (Front)
MP3/WMA/WAV Playback
Advanced Sound Retriever
MOSFET 50W x 4 Power Output
RCA Preouts x 2 (2V)
3-Band Equalizer (High/Mid/Low)
Rotary Volume Control
Card Remote Control
Detachable Face Security
Wired Remote Input
Anti-Dust Design

This blog entry shows how I replaced the original radio cassette with a Panasonic unit, installed rear parcel shelf speakers and a sub woofer with amplifier.
The car – a 1991 Toyota Camry SV21

This picture was taken new years day 2004 at Kalista up in the Dandenong’s.
The sound gear
Purchased a Panasonic CQ-C1101W 4 x 50W RMS CD Player from Super Cheap Auto for $149

and for the back parcel shelf a set of Panasonic CJA1600U 6-1/2" 2-Way Coaxial Speakers for $59.


US-Audio 12” sub and USA404ZA 4 channel 600W amp. I wanted a 2 channel (see further down).
Installation preparation


Take out the rear seat.


and and clean out the boot. Prepare to run some wiring, 12V from the battery through the bulkhead and from the console include the audio cables and remote turn on (blue) wire. With my particular model (Executive) the wiring loom includes the rear speakers but no speakers are installed so I don’t have to run those wires.
The original sound system was just a basic radio cassette with front speakers mounted in the dash – pretty tinny.
Installing the Panasonic head unit.

I usually don’t bother with a wiring harness that mates the unit with the car’s wiring loom, just use a standard terminal block. Work out all the wires with a multimeter, label as needed and then cut off the wiring loom sockets.
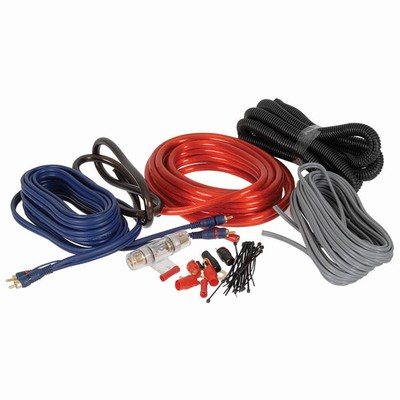 |
I used a Rampage 8G wiring kit, the usual painful bit is finding a way through the bulkhead for the 12V wire that runs from the battery directly to the amp. |
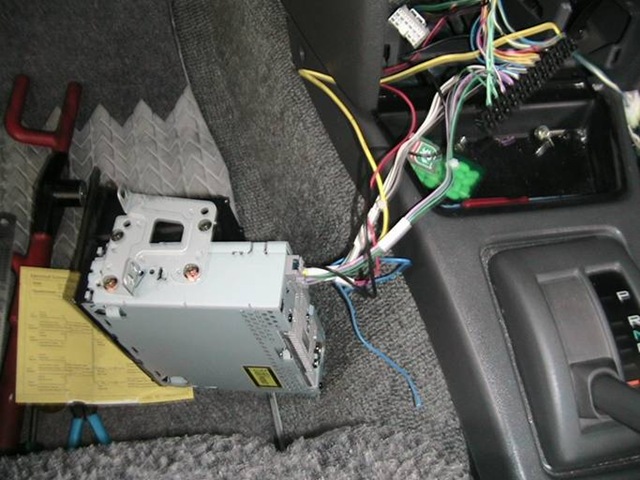
Tidy up everything and prepare to screw in the new unit. Lots of duct tape over the terminal block.
At this point before mounting the unit power up and check that the radio and speakers are working OK.


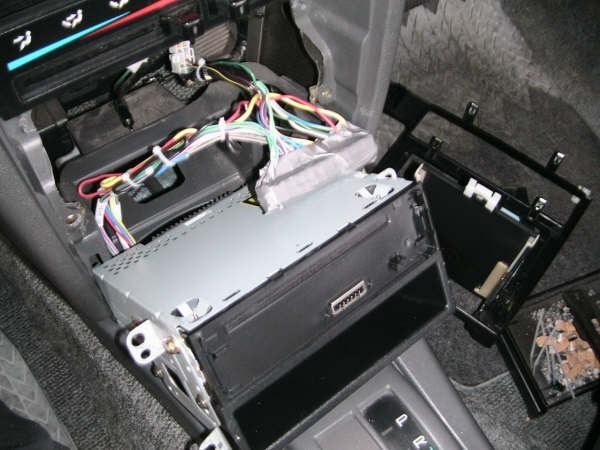
Unit is screwed in, now line up facia assembly and snap into place.


Just about done at the front, let’s pop in the first CD and take a break.
Installing the amp and sub


Here is the amp screwed to a piece of laminated MDF which in turn is screwed to the metalwork. The wiring is fairly simple; Ground, Remote and +12V straight from the battery. I found a spot nearby to bolt down the earth; cleaned/scraped around the screw hole and used star and spring washers to make a good electrical ground.
When I went down to Autobarn in Ringwood to purchase the amp and sub they were sold out on the 2 channel amps but no problem we will order one for you – cool. Anyway…when I went to pick up the amp I was informed they were not able to source the 2 channel so they got me a 4 channel for the same price. I really wanted a 2 channel bridged to run one sub. I checked that the 4 channel was bridgeable and said OK. In the picture you can see the sub speaker cable connected to the rear channels (top set) in bridge mode. The bottom unused set are the front channels.
Installing the rear parcel shelf speakers
The rear shelf metal work already has the holes for the speakers so all I have to do is climb into the boot and with a fat marking pen transfer the holes to the underside of the parcel shelf, working around things in my way like the boot torsion rods etc.


Remove the shelf and find somewhere suitable to cut out the holes, I used the green bin with a towel to protect the vinyl covering.
To make the cut’s I used a Stanley knife and small ball peen hammer, tap, tap…slowly working my way around each one.
Then I marked and drilled the speaker holes, pushed on speed clips and screwed down the speakers.


With the introduction of the A series speakers, you can now get high-tech Panasonic features at a super value. The A series feature durable mica-filled polypropylene cones with treated foam surrounds for great bass response, and polypropylene cone tweeters with metallic domes for crystal-clear highs. Includes grilles and mounting hardware.
Cone Material: High rigidity polypropylene injection coloured cone
Purchased this for my Camry SV31 audio upgrade.


Channel Configuration: 2Ch/1Ch
Line – Low Level Input x 2
Speaker – Hi Level Input x 2
High Level Auto Sensing – Power On/Off
MOSFET Power Supply
Toroidal Transformer
Dual Mode Capable
Output Power
CEA Rating: 60W x 2
DIN 45500 Rating (@ 14 V, THD 0.5 %)
4 ohm: 2 x 55W
4 ohm – BTL: 1 x 130W
2 ohm: 2 x 65W
Rated/THD (@ 14.4 V, 20 Hz – 20 kHz)
4 ohm: 2 x 55W / 0.04%
4 ohm – BTL: 1 x 130W / 0.1%
2 ohm: 2 x 65W / 0.1%
Maximum (@ 14.4 V)
4 ohm: 2 x 110W
4 ohm – BTL: 1 x 350W
2 ohm: 2 x 175W
Input
Low Pass Filter: 80Hz
LPF Roll Off Rate: -18dB/oct
Balanced Input Circuit: Balanced Input Circuit
Input sensitivity: 0.3 – 6Volts
Output
Frequency Response: 5Hz – 50kHz
Tolerance: +0 / -3dB
Signal to Noise Ratio (@ Rated Power): 100dB
Total Harmonic Distortion (@1 kHz): < 0.005%
CEA SN Ratio: 93dBA
Min Load Impedance/Ch: 2ohm
General
Current drain (@ Rated Power – 4Ù): 15Amps
Fuse Rating: 30Amps x 1
Weight (approx.): 2.0kg
Dimensions
(WxHxD in mm) approx: 306 x 55 x 201
This was purchased for a Nissan NX audio upgrade


Purchased this for a Nissan NX audio upgrade.
My younger kid NJ wanted to upgrade the audio in her Nissan NX so after some research off we went shopping to purchase a Kenwood CD player, Sony 2 channel amp and Sony Xplod sub in a kicker box. I didn’t take any photos of the install but checkout my Camry SV21 audio upgrade.

Kenwood KDC-MP3029 CD player
This was purchased for a Nissan NX audio upgrade.

General Features:
Single CD Features:
Tuner Features:
Audio Features:
Package Includes:
My younger kid NJ wanted to upgrade the audio in her Nissan NX so after some research off we went shopping to purchase a Kenwood CD player, Sony 2 channel amp and Sony Xplod sub in a kicker box.
I didn’t take any photos of this particular install but you can checkout my Camry SV21 audio upgrade.

 Sony XM-552ZR 2 Channel Car Amplifier
 Sony Xplod 12-Inch 1200-Watt Subwoofer (XSL121P5)


Sony Xplod 12-Inch 1200-Watt Subwoofer (XSL121P5)

 |
 |
| RCB23A This model of battery is used in nearly all Mongoose remote controls |
RCB27A Used in MRC80 (M80 Series) only |
http://www.mongoose.com.au/remote-controls-/previous-models/batteries.aspx
We have never replaced the batteries in the remote control units?